Unlocking the Golden Crunch: Your Guide to Perfect Fried Pork Chops
There's something uniquely comforting about a perfectly cooked, crispy
fried pork chop. It evokes memories of family dinners, simple pleasures, and that satisfying crunch with every bite. But achieving that ideal balance – golden crispiness on the outside, succulent tenderness within – often feels like a culinary mystery. Many settle for dry, overcooked chops or coatings that fall off, but we're here to share the secrets that will transform your kitchen into a temple of perfectly
fried pork chops, focusing on the crucial steps of marinating and smart reheating.
The Foundation of Flavor: Marinating for Tender, Juicy Chops
The journey to an unforgettable
fried pork chop begins long before it hits the hot oil. Marination is a non-negotiable step that infuses flavor and, more importantly, *tenderizes* the meat.
Buttermilk and Hot Sauce: A Match Made in Heaven
The classic Southern approach, often hailing from regions like Mississippi, leverages the power of buttermilk combined with a touch of hot sauce. Here's why this dynamic duo works wonders:
- Buttermilk's Magic: The lactic acid in buttermilk acts as a gentle tenderizer. Unlike harsher acids like vinegar or lemon juice, it breaks down tough muscle fibers without "cooking" the meat, resulting in incredibly moist and tender chops. It also helps the seasoned flour adhere better, creating a more robust crust.
- Hot Sauce for Flavor and More: A dash of your favorite hot sauce isn't just for heat; it adds a subtle depth of flavor and its own acidic properties further aid in tenderization. Don't worry if you're not a fan of intense spice – a little goes a long way and often just brightens the overall taste without overwhelming heat.
Pre-Marination Seasoning and Preparation
Before submerging your chops, give them a generous seasoning of salt and black pepper on both sides. This initial seasoning penetrates the meat, laying a crucial flavor base. When choosing your pork chops, consider these tips:
- Bone-In vs. Boneless: While boneless chops are convenient, bone-in chops, ideally about an inch thick, are often preferred. The bone helps retain moisture and flavor during frying, leading to a juicier result. If using boneless, be extra vigilant not to overcook them, as they can dry out quickly.
- Thickness Matters: Aim for chops around one inch thick. This allows enough time for the exterior to crisp up beautifully without the interior becoming dry.
- Marbling: Look for chops with a good amount of fat marbling. Fat equals flavor and moisture!
Whisk your hot sauce into the buttermilk, then fully submerge your seasoned pork chops. Ensure they are completely coated and let them soak. For optimal results, a minimum of 30 minutes is good, but several hours or even overnight in the refrigerator will yield even more tender and flavorful chops.
The Art of the Crispy Coating: Breading Techniques
Once your chops are thoroughly marinated, the next step is building that irresistible crispy coating. This isn't just about throwing flour on; it's a deliberate process.
The Seasoned Flour Dredge
A flavorful flour dredge is critical. Combine all-purpose flour with a blend of seasonings in a large zip-top bag or a shallow dish. Think beyond just salt and pepper; consider paprika (for color and mild flavor), garlic powder, onion powder, and a pinch of cayenne pepper if you enjoy a little kick. For convenience and an extra crispy texture, you can even make your own self-rising flour: simply whisk 1½ teaspoons of baking powder and ¼ teaspoon of salt into every cup of all-purpose flour. Shake the bag or whisk the ingredients until everything is evenly mixed.
Double-Dredging for Maximum Crunch
For that truly "extra crispy" experience, employ the double-dredge technique.
- Take a marinated chop, let any excess buttermilk drip off, and place it into your seasoned flour mix.
- Press the flour firmly onto both sides of the meat, ensuring every crevice is coated.
- For maximum crunch, dip the chop *back* into the buttermilk briefly, then return it to the seasoned flour for a second coating. Again, press firmly to create a thick, well-adhered crust.
The Critical Rest Period
After breading, resist the urge to immediately fry. Place your breaded pork chops on a parchment-lined baking sheet and let them sit for at least 15-20 minutes at room temperature. This "rest period" is vital because it allows the moisture from the buttermilk to hydrate the flour, forming a paste-like bond that helps the coating adhere properly during frying, preventing it from flaking off.
Mastering the Fry: Achieving Golden-Brown Perfection
With your chops perfectly marinated and breaded, it’s time for the grand finale: frying. This step requires attention to detail, especially regarding oil temperature and technique. You can learn even more about achieving that classic crunch in our guide to
Crispy Southern Fried Pork Chops: The Mississippi Buttermilk Way.
Oil Choice and Temperature
Use a heavy-bottomed skillet, such as cast iron, which maintains heat consistently. Choose an oil with a high smoke point, like vegetable, canola, or peanut oil. Heat the oil to around 350-375°F (175-190°C). A consistent oil temperature is paramount; if it's too cool, the chops will absorb too much oil and become greasy; if too hot, the coating will burn before the meat cooks through.
Frying Technique
Carefully place the breaded pork chops into the hot oil, ensuring not to overcrowd the pan. Fry until golden brown and cooked through, typically 4-6 minutes per side, depending on thickness. Flip as needed to achieve even browning. The internal temperature should reach 145°F (63°C) for doneness.
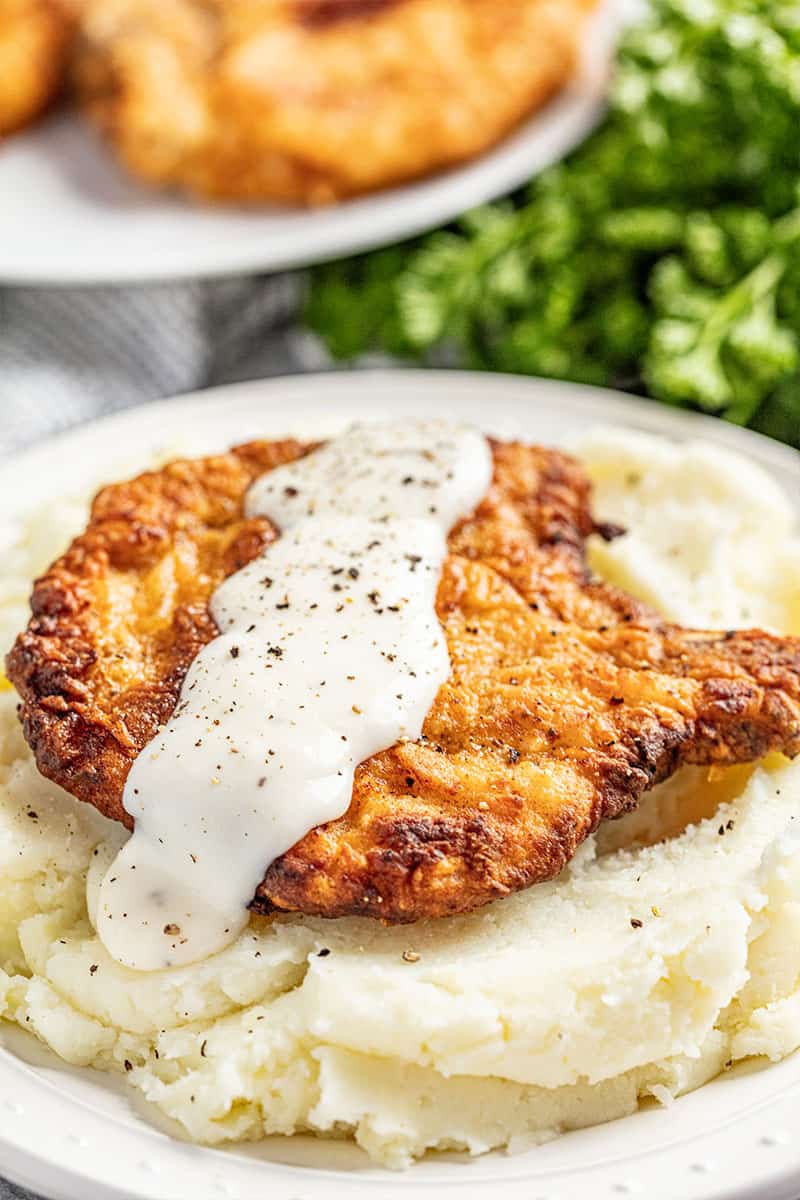
Once cooked, immediately transfer your
fried pork chops to a wire rack set over a paper towel-lined baking sheet. This allows excess oil to drain away and prevents the bottom from becoming soggy, maintaining that coveted crispiness. Let them rest for a few minutes before serving; this allows the juices to redistribute, ensuring a tender, moist chop. Serve hot, perhaps with a classic gravy for smothered pork chops, or simply as they are for that pure, crispy delight.
From Fridge to Fabulous: Reheating Fried Pork Chops Without Losing the Crunch
Leftover
fried pork chops can be a treasure, but reheating them can often lead to a soggy disappointment. The key is to avoid moisture and reintroduce dry heat.
The Golden Rule: Skip the Microwave!
Seriously, if you want your crispy coating back, put down the microwave. Microwaves heat food by agitating water molecules, which turns the crisp exterior into a sad, steamy mess.
Best Reheating Methods for Optimal Crispiness
- Oven Revival: This is a classic and reliable method. Preheat your oven to 350°F (175°C). Place the cooled pork chops directly on a wire rack set over a baking sheet (this allows air circulation for crispiness) or on a regular baking sheet. Reheat for 10-15 minutes, or until warmed through and the coating feels crispy to the touch. The dry, even heat of the oven is perfect for bringing back that crunch.
- Air Fryer Magic: For ultimate convenience and crispiness, the air fryer is your best friend. Preheat your air fryer to 350°F (175°C). Place the chops in a single layer in the air fryer basket (do not overcrowd) and "fry" for 5-8 minutes, or until thoroughly heated and wonderfully crispy again. The circulating hot air mimics deep frying, giving you incredible results.
For both methods, consider letting the chops come to room temperature for about 15-20 minutes before reheating. This helps them heat more evenly.
Storing Your Culinary Creations: Tips for Freshness
Proper storage ensures your
fried pork chops remain delicious for later enjoyment.
- Cool Completely: Always allow the fried pork chops to cool completely to room temperature before storing. Packing them while warm will create condensation, leading to sogginess.
- Refrigerator Storage: Once cooled, wrap individual chops tightly in plastic wrap or aluminum foil, or place them in an airtight container. Stored this way, they will keep well in the fridge for up to 4 days.
- Freezer Storage: For longer preservation, cooled chops can be frozen for up to 3 months. Place them in a zip-top freezer bag, pressing out as much air as possible to prevent freezer burn, or use a freezer-safe container. Thaw overnight in the refrigerator before reheating using the methods above.
Conclusion
Creating crispy, juicy
fried pork chops is an achievable culinary delight, not a daunting task. By focusing on thoughtful marination, meticulous breading with a crucial resting period, precise frying techniques, and smart reheating strategies, you can consistently achieve that golden-brown, satisfying crunch. This isn't just a recipe; it's a journey into making truly comforting food that tastes amazing every time, whether fresh from the pan or reheated the next day. Embrace these secrets, and you'll soon be serving up what might become your family's new favorite: tender, flavorful, and perfectly crispy
fried pork chops. For even more ways to enjoy this classic, explore our tips for
Easy Fried Pork Chops: Your Simple, Comforting Family Dinner.